
Hydraulic Cylinder Repair Kits: What’s Inside and How to Use Them
When it comes to maintaining heavy machinery and equipment, one of the most critical components is the hydraulic cylinder. These cylinders power everything from construction equipment to agricultural machinery, and their performance directly impacts the efficiency and safety of operations. But over time, even the best hydraulic cylinders can experience wear and tear, leading to costly repairs and downtime.
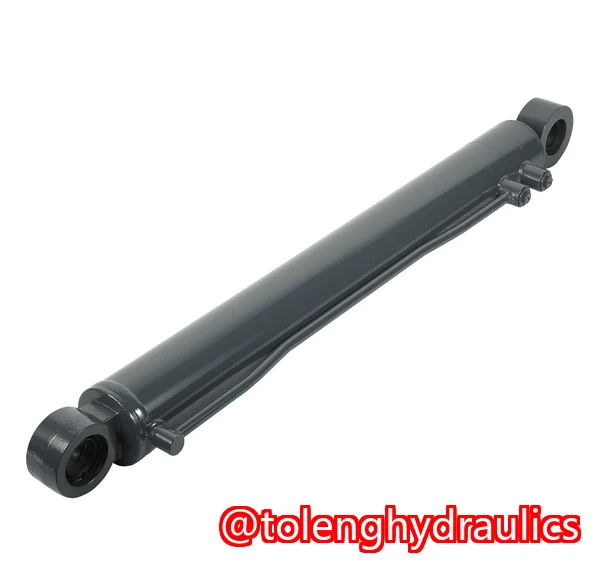
That’s where hydraulic cylinder repair kits come in. These kits are essential tools for anyone looking to extend the lifespan of their cylinders without the need for a full replacement. However, to use them effectively, it’s important to understand what’s inside the kit and how to make the best use of each part. In this article, I’ll guide you through the essential components of a hydraulic cylinder repair kit, how to use them properly, and the steps you can take to avoid unnecessary breakdowns and ensure your cylinders perform at their best for years to come.
Why Hydraulic Cylinders Fail: A Real-World Scenario
Imagine this: you’re managing a fleet of construction equipment on a job site, and suddenly, one of the hydraulic cylinders on your excavator starts leaking. The machine is down, and the repairs are going to cost you time and moneysomething you can’t afford when deadlines are tight. But the real kicker? That cylinder wasn’t old at all. In fact, it was a relatively new replacement.
What happened? More often than not, premature failures like these are the result of low-quality seals, improper installation, or incorrect material choices. You might have thought the cylinder was a quality part because it looked good on the outside, but there’s a lot more to inspecting hydraulic cylinders than just the exterior appearance.
Hydraulic cylinders work under immense pressure, and even a minor defect or oversight during installation can lead to major issues down the line. In this case, a quick inspection using a reliable hydraulic cylinder repair kit could have saved the day and prevented further damage.
What’s Inside a Hydraulic Cylinder Repair Kit?
Hydraulic cylinder repair kits are designed to make repairs as straightforward as possible, even for those with limited technical experience. The exact contents can vary depending on the manufacturer and the specific type of cylinder, but most kits contain the following key components:
-
Seals and O-Rings: These are the most important parts of any hydraulic cylinder repair. Over time, seals can become brittle and break down, leading to leaks and inefficient performance. A good kit will include a range of seals that match the dimensions and materials of the original seals.
-
Piston Rod Scrapers and Wipers: These components are crucial for keeping dirt and debris from entering the cylinder, which can cause scratches and damage to the rod. Without them, the cylinder is more likely to experience premature wear.
-
Cylinder End Caps: If the end cap is damaged, it can compromise the integrity of the entire cylinder. Some repair kits come with replacement caps that fit specific cylinder models.
-
Bearings: Bearings ensure smooth operation of the piston within the cylinder. Over time, they can degrade, causing friction and wear on the cylinder’s interior. These are included in high-quality repair kits for easy replacement.
-
Instruction Manual: The best repair kits will come with a detailed guide that provides step-by-step instructions for each repair task, including how to disassemble the cylinder, remove damaged parts, and reassemble everything correctly.
How to Use a Hydraulic Cylinder Repair Kit: Step-by-Step Guide
Now that we know what’s inside the repair kit, let’s talk about how to use it. Proper installation and maintenance are essential to avoid damaging your hydraulic cylinders and to extend their service life. Here’s a simple step-by-step guide to help you through the process:
1. Disassemble the Cylinder
Before starting, make sure you have the right tools for the job, including wrenches, pliers, and a soft hammer. Begin by carefully removing the cylinder from the machine and placing it on a clean, flat surface. Use the manual provided with the repair kit to remove the piston and rod assembly from the cylinder tube. Be sure to handle each part carefully to avoid damaging the threads or seals.
2. Inspect the Cylinder Components
This is where you can really catch potential issues early on. Look for any signs of wear or damage on the cylinder tube, piston, and rod. Specifically:
-
Check the bore finish inside the cylinder tube for any scoring or uneven surfaces.
-
Inspect the piston rod for straightness and surface defects.
-
Examine the seals for cracks, wear, or signs of improper installation.
If you notice any issues, such as rough spots or damaged parts, they may need to be replaced with parts from your repair kit.
3. Clean and Prepare the Parts
Before installing new seals or components, thoroughly clean the cylinder and its parts to remove any dirt, debris, or old seal material. This will help prevent contamination and ensure a better seal when reassembling.
Use a soft cloth or brush to clean the rod, and make sure no metal shavings or residue remain that could damage the seals.
4. Replace the Seals
Now it’s time to replace the seals. Begin by removing the old seals from the piston and cylinder tube. Be careful not to scratch the surfaces, as this can lead to leaks down the road. Match the old seals to the new ones from the repair kit, ensuring they fit properly.
Install the new seals in the same order and position as the old ones. Lubricate the seals with hydraulic oil to make the installation process smoother.
5. Reassemble the Cylinder
Once the seals and bearings are in place, it’s time to reassemble the cylinder. Carefully slide the piston and rod assembly back into the cylinder tube. Make sure everything is aligned properly, and tighten the cylinder end caps securely.
6. Test the Repair
Before putting the cylinder back into service, it’s essential to perform a test. Reinstall the cylinder into the machine, and run it through a full cycle to check for leaks or performance issues. If the cylinder is operating smoothly without leaks or abnormal noise, your repair was a success!
Why Inspections Are Crucial for Preventing Failures
Using a repair kit is an excellent way to extend the life of your hydraulic cylinders, but it’s not the only solution. Regular inspections are essential for preventing unexpected failures that can cause downtime and costly repairs. Here are a few inspection tips:
-
Check Cylinder Tube and Bore Finish: The internal surface of the cylinder tube should be smooth and free of scratches. If you notice a rough finish or scoring, the cylinder will wear out much faster.
-
Inspect Piston Rod Condition: The rod should be free of pitting, rust, or damage. Rod damage can cause seals to fail, leading to leaks and poor performance.
-
Evaluate Seal Materials: Not all seals are created equal. Choosing the right materials based on your application can drastically improve cylinder longevity. For example, fluorocarbon seals are better for high-temperature environments, while polyurethane is more suited to agricultural machinery.
-
Examine Mounting Styles: Different mounting styles, like welded or tie-rod, offer varying levels of strength and durability. Be sure to choose the correct type for your specific equipment.
Conclusion: Maximize Cylinder Longevity with the Right Inspection and Repair Tools
In conclusion, hydraulic cylinder repair kits are a valuable investment for anyone looking to maximize the lifespan and reliability of their equipment. By understanding the components inside the kit and following the proper steps for inspection and repair, you can avoid costly downtime and ensure your hydraulic cylinders are always in top condition.
I highly recommend following these inspection guidelines and using high-quality repair kits to ensure any hydraulic cylinder purchase delivers long-term reliability and performance. Whether you’re working with construction equipment, agricultural machinery, or industrial systems, these maintenance steps will help you keep everything running smoothly.
For more information on hydraulic cylinder maintenance and to browse our selection of high-quality hydraulic cylinders, visit 🔗 Toleng Hydraulics today.
FAQ
-
How can I tell if a hydraulic cylinder has quality seals?
Quality seals should be made from durable materials like polyurethane, fluorocarbon, or nitrile. They should fit snugly in their grooves and show no signs of cracking or wear. Inspecting the seals regularly will help you identify any early signs of deterioration.
-
What rod surface finish is best for long seal life?
A smooth, hard chrome finish is ideal for maintaining seal integrity. It prevents scoring and provides a better surface for seals to work against, minimizing wear and leaks.
-
How do I measure bore size and stroke length correctly?
Use a caliper to measure the bore size of the cylinder and ensure it matches the specifications. For stroke length, measure the distance the piston moves from fully extended to fully retracted.
-
What are the signs of a poorly manufactured cylinder?
Look for irregular welds, uneven surface finishes, and misaligned mounting points. Poor-quality cylinders often have visible defects in their construction, which can lead to early failure.
-
Which cylinder mounting styles are strongest?
Welded cylinders tend to be stronger and more durable compared to tie-rod cylinders. Welded cylinders are often preferred for heavy-duty applications, while tie-rod cylinders are easier to assemble and maintain.
-
How do I choose between welded and tie-rod cylinders?
Welded cylinders are better for high-stress applications, while tie-rod cylinders are more suitable for lighter duties or where ease of maintenance is prioritized. Consider the load requirements of your equipment.
-
What chrome plating thickness should I look for on rods?
The chrome plating thickness should typically be between 0.001″ and 0.003″ (25 to 75 mic

