
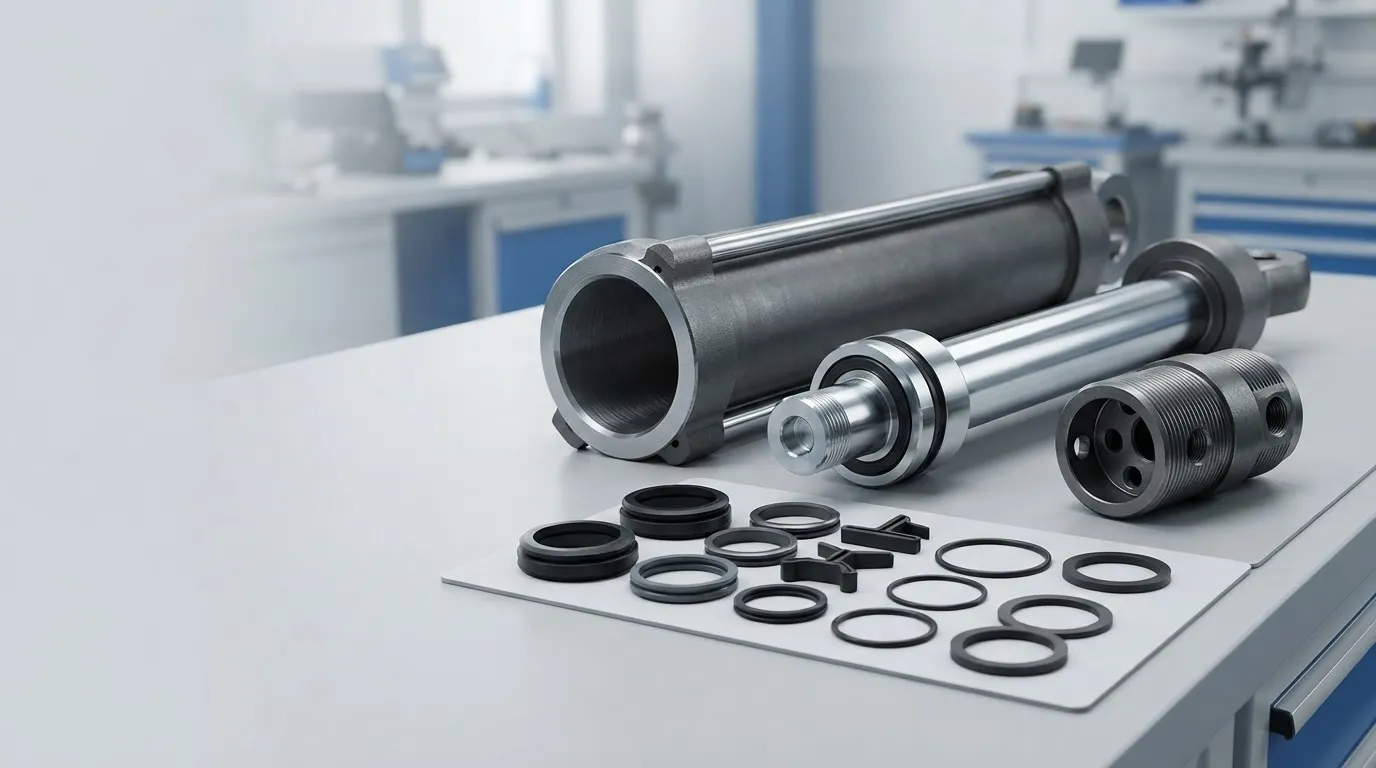
Hydraulic cylinder seals prevent fluid leakage, maintain operating pressure, and help hydraulic equipment move smoothly and reliably. When a rod seal, piston seal, or other sealing component wears out, the cylinder may begin leaking, lose performance, or experience internal fluid bypass.
Knowing how to replace hydraulic cylinder seals can help maintenance teams identify the cause of a problem, select the correct replacement seal kit, and avoid unnecessary equipment downtime. However, replacing seals involves more than removing old components and fitting new ones. Incorrect seal selection, damaged sealing surfaces, or improper installation can cause leaks to return shortly after repair.
This guide explains when hydraulic cylinder seals should be replaced, how to identify the correct seal kit, how to remove and install seals, and how to troubleshoot leaks after replacement.
Important safety notice: Hydraulic cylinder seal replacement should be performed by qualified personnel following the equipment and cylinder manufacturer’s service instructions. Hydraulic systems may retain dangerous pressure even after the power source has been switched off. Never disassemble a pressurized cylinder or rely on hydraulic pressure alone to support a suspended load.
When Should Hydraulic Cylinder Seals Be Replaced?
Hydraulic cylinder seals are designed to control fluid movement between components and prevent oil from escaping the cylinder. Over time, seals may deteriorate because of friction, contamination, temperature, pressure, incompatible fluids, or normal service wear.
Recognizing the symptoms early can help prevent further damage to the cylinder and surrounding hydraulic system.
1. External Hydraulic Fluid Leaks
Oil leaking around the piston rod, gland, end cap, or cylinder connections may indicate a sealing problem.
A damaged or worn rod seal can allow hydraulic fluid to escape as the piston rod extends and retracts. A deteriorated static O-ring may leak around a stationary joint.
Before replacing seals, clean the affected area and inspect it during a controlled operational check, following the equipment manufacturer’s procedures. This helps distinguish an active leak from residual oil, fluid from a nearby connection, or another source of contamination.
2. Internal Leakage and Cylinder Drift
A hydraulic cylinder may lose its ability to hold a load or maintain its position because fluid is bypassing the piston seal.
Possible symptoms include:
- Gradual movement when the cylinder should remain stationary.
- Reduced load-holding performance.
- Unstable movement under certain operating conditions.
- Reduced efficiency or inconsistent force.
However, cylinder drift does not automatically mean the piston seal has failed. Control valves, check valves, external loads, and other system components can produce similar symptoms. Appropriate diagnostic testing is necessary before disassembly.
3. Reduced Performance or Inconsistent Movement
Worn seals may contribute to pressure loss, reduced efficiency, or irregular cylinder movement. Other possible causes include inadequate pump output, restricted hydraulic lines, air in the system, contamination, and mechanical binding.
Diagnose the complete hydraulic circuit rather than replacing seals based on performance symptoms alone.
4. Visible Seal Damage or Surface Wear
If a cylinder has already been disassembled, inspect the seals for cuts, cracks, hardening, deformation, extrusion, or uneven wear.
These signs may indicate that replacement is necessary. Also inspect the piston rod, cylinder bore, seal grooves, and guide components. Installing new seals without addressing damage to the mating surfaces may result in repeated failure.
Types of Hydraulic Cylinder Seals
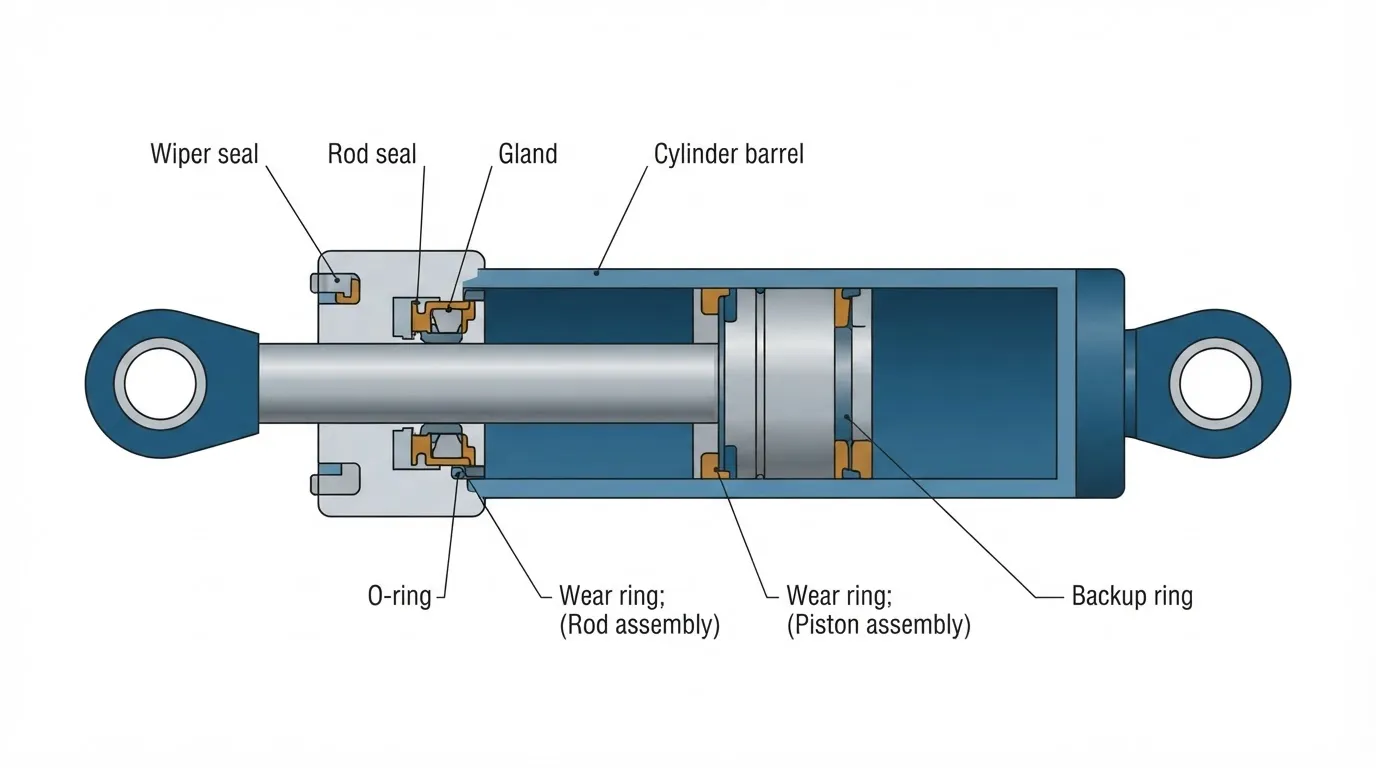
Understanding the different types of hydraulic cylinder seals helps you identify which components require replacement and how they should be installed.
Rod Seals
Rod seals prevent hydraulic fluid from leaking along the piston rod as it moves through the cylinder head or gland. They must maintain sealing performance while accommodating reciprocating movement and operating pressure.
Rod seals are commonly made from polyurethane, elastomers, PTFE-based materials, or other application-specific compounds.
Piston Seals
Piston seals prevent fluid from bypassing the piston between the two sides of the cylinder.
In a double-acting hydraulic cylinder, the piston seal helps maintain the pressure difference required for extension and retraction. Its design depends on operating pressure, fluid compatibility, temperature, piston configuration, and application requirements.
Wiper Seals
Also called dust seals or scraper seals, wiper seals remove dirt, moisture, and other contaminants from the piston rod as it retracts.
A damaged wiper seal can allow contamination to enter the cylinder, potentially accelerating wear on the rod seal, piston seal, and internal surfaces.
O-Rings and Backup Rings
O-rings are commonly used for static sealing at joints, ports, and other interfaces. Depending on the design, they may also be used in dynamic sealing applications.
Backup rings help support certain seals against extrusion into clearance gaps under pressure. They are particularly important in applications where pressure and seal geometry require additional support.
O-ring material, cross-section, groove dimensions, and installation requirements must match the intended application.
Wear Rings and Guide Rings
Wear rings, sometimes called guide rings, support and guide the piston or piston rod assembly. They help maintain alignment and reduce direct metal-to-metal contact.
Although wear rings are not primary fluid-sealing components, they are important during a seal replacement because excessive wear or incorrect clearance can contribute to side loading and premature seal failure.
How to Identify the Correct Hydraulic Cylinder Seal Kit
Selecting the correct hydraulic cylinder seal kit is one of the most important steps in the replacement process. Two cylinders with the same bore diameter may use different seal profiles, groove dimensions, materials, and assembly configurations.
Whenever possible, begin with the original cylinder documentation.
Check the Cylinder Model and Part Number
Locate the cylinder nameplate, model number, serial number, or original part number. Use this information to identify the manufacturer’s recommended seal kit.
For OEM equipment, the equipment model and serial number may also help identify the original cylinder configuration.
Identify the Seal Profile and Material
If the original part number is unavailable, inspect the existing seals and sealing grooves after safe disassembly.
Record the seal profile, cross-section, dimensions, and orientation. Also consider the hydraulic fluid, operating temperature, working pressure, and environmental conditions.
Do not select a replacement solely because it looks similar to the original seal.
Verify Operating Conditions
The replacement seal must be compatible with the hydraulic fluid and operating environment.
Consider:
- Normal and maximum operating pressure.
- Minimum and maximum operating temperature.
- Hydraulic fluid type and additives.
- Reciprocating speed and duty cycle.
- Potential contamination and environmental exposure.
A seal material suitable for one hydraulic system may not perform reliably in another.
Seal Kit Identification Checklist
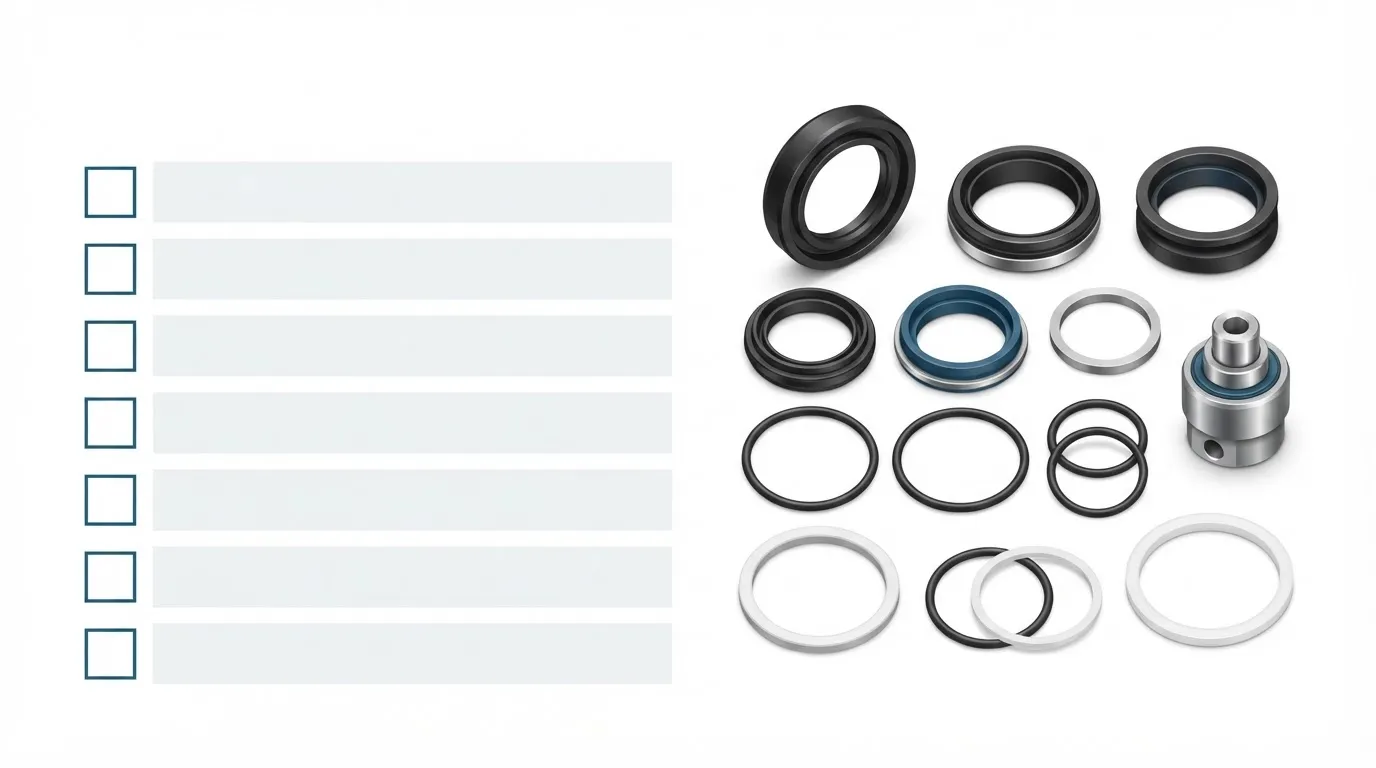
Before ordering a replacement hydraulic cylinder seal kit, collect the following information:
- Bore diameter: The cylinder’s internal diameter.
- Piston rod diameter: The diameter of the rod passing through the gland.
- Seal groove dimensions: The relevant groove width, depth, and geometry.
- Cylinder model: The model and serial number, where available.
- Manufacturer or part number: Original identification details.
- Seal material and fluid type: The material requirements and hydraulic fluid used.
- Operating pressure and temperature: The cylinder’s service conditions.
- Photos: Clear images of the cylinder nameplate, assembly, and existing seals.
If the original seal kit number is unavailable, these details can help a qualified supplier identify a suitable replacement. Photos and measurements are useful supporting information, but they may not be sufficient to confirm compatibility without additional specifications.
How to Measure a Hydraulic Cylinder for Seals
Accurate measurements help prevent ordering an incorrect seal kit. When possible, use the original cylinder drawing, service documentation, or verified part number alongside physical measurements.
Measure the Cylinder Bore and Piston Rod Diameter
The bore diameter is the internal diameter of the cylinder barrel. The piston rod diameter is measured across the rod’s cylindrical surface.
Use suitable measuring instruments and record the measurements in a consistent unit, such as millimeters or inches.
Be aware that bore diameter and rod diameter alone do not determine the complete seal kit.
Inspect the Seal Groove Dimensions
After the cylinder has been safely disassembled, inspect the relevant seal grooves. Depending on the component, measurements may include groove width, depth, diameter, and other profile-specific dimensions.
Use appropriate precision measuring tools. Do not assume that a worn or deformed old seal accurately represents the original design dimensions.
Record Additional Cylinder Details
Depending on the application, useful information may include:
- Cylinder stroke and retracted length.
- Piston and gland design.
- Mounting configuration.
- Port arrangement.
- Seal orientation and assembly sequence.
For more detailed measurement guidance, see Toleng’s Hydraulic Cylinder Measurement Guide.
Tools Needed to Replace Hydraulic Cylinder Seals
The tools required depend on the cylinder design, seal configuration, and manufacturer’s service procedure.
Common tools and supplies include:
- Manufacturer-specified wrenches, sockets, and gland tools.
- Non-marring seal removal picks and installation tools.
- Calipers, micrometers, or other suitable measuring instruments.
- Lint-free cleaning materials and approved cleaning products.
- Manufacturer-approved assembly lubricant.
- Suitable lifting equipment and secure workholding fixtures.
- Appropriate personal protective equipment.
Some cylinders require specialized fixtures or tools to remove retaining rings, glands, or threaded components safely.
Avoid using sharp metal tools that can scratch the piston rod, damage the cylinder bore, or deform seal grooves. Even minor surface damage can compromise the sealing system.
How to Remove Old Hydraulic Cylinder Seals
The following is a general maintenance overview, not a universal disassembly procedure. Follow the specific cylinder manufacturer’s instructions whenever they are available.
Step 1: Depressurize and Secure the Equipment
Shut down the equipment and isolate its energy sources according to the applicable lockout and energy-control procedures.
Secure all suspended or movable loads using approved mechanical supports. Never rely on a hydraulic cylinder, control valve, or trapped hydraulic pressure alone to hold a load.
Follow the manufacturer’s procedure for releasing stored hydraulic energy, including pressure trapped in accumulators and isolated sections of the circuit. Verify that the relevant components are in a safe state before disconnecting hydraulic lines.
Hydraulic fluid can penetrate skin under pressure and cause serious injury. Never use your hands to search for a pressurized leak.
Step 2: Remove the Cylinder According to Service Instructions
If the cylinder must be removed from the machine, identify the mounting arrangement, support the cylinder appropriately, and follow the equipment manufacturer’s removal procedure.
Disconnect and cap hydraulic lines using suitable methods to limit contamination and fluid loss. Account for the cylinder’s weight and any stored mechanical energy.
Some seal repairs may be possible without removing the entire cylinder, but this depends on the design and approved service procedure.
Step 3: Disassemble the Gland or Piston Assembly
Secure the cylinder in suitable workholding equipment before disassembly.
Depending on the design, the cylinder may use a threaded gland, retaining ring, bolted end cap, or another retention system. Use the specified tools and follow the correct disassembly sequence.
Do not apply uncontrolled force or heat to remove stuck components. If a component cannot be removed safely, consult the manufacturer’s service information or a qualified hydraulic technician.
Step 4: Remove the Old Seals
Carefully remove the rod seal, piston seal, wiper seal, O-rings, and other specified replacement components.
Record their original positions and orientations before removal. Photographing the assembly can help document the arrangement.
Use non-marring tools and avoid scratching sealing surfaces or damaging grooves. Replace other components only according to the inspection findings and the manufacturer’s repair requirements.
Step 5: Inspect the Cylinder Components
Clean the components using approved methods and inspect them under suitable lighting.
Check for:
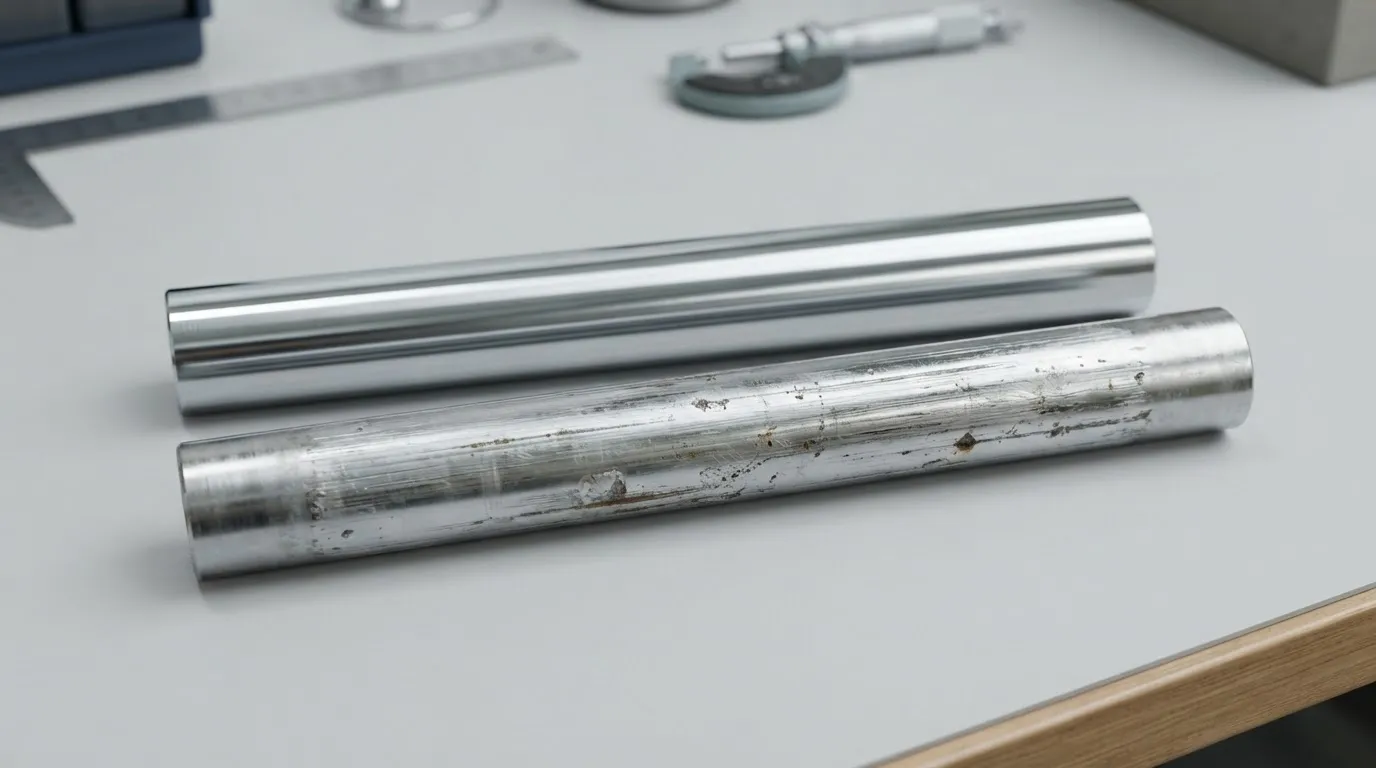
- Scratches, corrosion, or damaged chrome plating on the piston rod.
- Scoring, wear, or damage inside the cylinder bore.
- Burrs, sharp edges, or deformation around seal grooves.
- Excessive wear on guide rings and bearing surfaces.
- Cracks, distortion, or other structural damage.
If a sealing surface is damaged beyond the manufacturer’s allowable limits, installing new seals alone may not restore reliable operation.
How to Install New Hydraulic Cylinder Seals
Correct seal installation is essential for preventing leaks and achieving reliable service life. Always follow the seal supplier’s instructions and the cylinder manufacturer’s assembly specifications.
Step 1: Clean and Inspect All Components
Remove contamination, residual oil, and debris using approved cleaning materials. Make sure all sealing grooves and mating surfaces are clean and free from burrs or damage.
Do not use cleaning products that may attack the seal material or leave harmful residues.
Step 2: Confirm the Replacement Seal Kit
Compare the new seals with the specified parts and verify their dimensions, profiles, materials, and intended locations.
Check the quantity of each component and confirm whether backup rings, guide rings, or additional sealing elements are required.
Do not force an incorrect seal into a groove simply because its diameter appears close to the required size.
Step 3: Lubricate Seals as Specified
Use the assembly lubricant or compatible hydraulic fluid recommended by the seal or cylinder manufacturer.
Appropriate lubrication can reduce friction and help prevent damage during installation. However, not all lubricants are compatible with every seal material.
Avoid excessive lubricant, contamination, and unapproved grease or petroleum products.
Step 4: Install Rod Seals and Wiper Seals
Install the rod seal and wiper seal using the specified tools and orientation.
Some rod seals have a directional sealing lip or a particular pressure-facing side. Others use different geometries and installation methods.
Follow the product-specific instructions rather than assuming that every seal lip should face the same direction. Avoid twisting, cutting, or stretching the seal beyond its permitted installation limits.
Where a seal must pass over threads, grooves, or sharp edges, use an appropriate installation sleeve or protective tool as specified.
Step 5: Install Piston Seals and Guide Rings
Fit the piston seal and guide rings according to the component design.
Some seals are stretch-fit designs, while others require special installation tools or controlled deformation. Certain PTFE-based seals may require a specified installation and sizing procedure.
Do not use a generic heating method or force a seal into place unless the manufacturer explicitly permits it.
After installation, check that the seals are correctly seated, undamaged, and oriented as specified.
Step 6: Reassemble the Cylinder
Reassemble the piston, rod, gland, retaining components, and cylinder barrel in the specified order.
Protect the new seals from threads, sharp edges, and other potential sources of damage during insertion.
Use the manufacturer’s specified tightening sequence, torque values, clearances, and retention procedures. Do not guess torque values or modify components to make the assembly fit.
Step 7: Test for Leaks and Proper Operation
Before returning the cylinder to service, confirm that the assembly and connections have been completed according to the applicable specifications.
Testing should follow the manufacturer’s procedure and use suitable equipment, safeguards, and pressure limits.
Where specified, check for leakage, smooth movement, abnormal noise, and proper operation under controlled conditions. Increase operating demands only as permitted by the test procedure.
Never search for leaks with your hands or loosen a fitting while the system is pressurized. If abnormal leakage, movement, or noise occurs, stop the test safely and investigate the cause before returning the equipment to operation.
Common Hydraulic Cylinder Seal Installation Mistakes
Many recurring hydraulic cylinder leaks result from incorrect seal selection, installation damage, or failure to address the original cause of the problem.
| Common mistake | Possible consequence | Recommended approach |
|---|---|---|
| Installing the wrong seal size or profile | Leakage or poor sealing performance | Verify the part number, dimensions, and groove design |
| Reversing a directional seal | Incorrect sealing behavior or leakage | Follow the seal manufacturer’s orientation instructions |
| Cutting or twisting a seal during installation | Early seal failure | Use appropriate tools and protective sleeves |
| Using incompatible seal material | Swelling, hardening, or deterioration | Check fluid and temperature compatibility |
| Ignoring rod scoring or bore damage | Repeated leakage and accelerated wear | Inspect mating surfaces against service limits |
| Reusing damaged seals | Continued or recurring leakage | Replace components as specified |
| Contaminating the assembly | Abrasion and premature wear | Maintain clean components and work areas |
| Guessing assembly torque | Component damage or improper retention | Follow manufacturer specifications |
| Failing to investigate the original fault | Repeat failure after repair | Diagnose the cylinder and hydraulic system |
Why Do New Hydraulic Cylinder Seals Leak?
If a cylinder leaks soon after seal replacement, installing another set of seals without further diagnosis may not solve the problem.
Incorrect Seal Size or Profile
A seal that does not match the groove geometry, clearance, or intended pressure range may fail to seal correctly.
Verify the replacement part number and dimensions against the cylinder specifications.
Damaged Piston Rod or Cylinder Bore
Scratches, corrosion, worn plating, and damaged sealing surfaces can allow fluid to bypass a new seal or cause its sealing lip to wear prematurely.
Inspect the affected surfaces and determine whether repair or replacement is required under the manufacturer’s service limits.
Contamination During Assembly
Metal particles, dirt, lint, and other debris can damage seals or interfere with sealing contact.
Keep components clean throughout disassembly, inspection, and reassembly.
Excessive Pressure, Temperature, or Side Loading
Operating conditions outside the cylinder or seal design limits may contribute to extrusion, accelerated wear, or leakage.
Incorrect alignment, worn guide components, and side loading may also damage sealing surfaces. Review the operating conditions and investigate the source of excessive loads or pressure.
Incorrect Installation or Assembly Damage
A seal may be cut, twisted, pinched, or incorrectly oriented during installation. Damage can also occur while the rod or piston assembly passes through a sharp edge or thread.
If the cylinder leaks after repair, follow a systematic troubleshooting process rather than repeatedly replacing seals without identifying the root cause.
For additional diagnostic guidance, see Toleng’s Hydraulic Cylinder Repair Guide.
When Should You Replace the Entire Hydraulic Cylinder?
Replacing seals is not always the most effective or appropriate repair.
Consider professional inspection, cylinder rebuilding, or complete replacement when:
- The piston rod has severe scoring, corrosion, or damaged chrome plating.
- The cylinder bore is damaged beyond permitted repair limits.
- The gland, piston, barrel, or mounting components are cracked or deformed.
- Critical dimensions or clearances cannot be restored within specifications.
- Replacement parts are unavailable or the cylinder cannot be repaired safely.
- The expected repair cost, downtime, or reliability risk makes replacement more practical.
A rebuild may be appropriate when the cylinder structure remains serviceable and damaged components can be restored or replaced according to approved specifications.
For older, obsolete, or application-specific cylinders, a qualified manufacturer may also be able to evaluate a replacement design based on verified dimensions, mounting requirements, stroke, operating pressure, and application conditions.
The decision should consider technical feasibility, safety, total repair cost, and expected service requirements rather than seal price alone.
Frequently Asked Questions
Can I Replace Hydraulic Cylinder Seals Without Removing the Cylinder?
Sometimes. Certain cylinder designs allow seal replacement while the cylinder remains mounted on the equipment. Others require complete removal and disassembly.
The correct method depends on the cylinder construction, access, equipment configuration, and manufacturer’s service instructions. Safe isolation, pressure release, and load support are essential in either case.
How Long Does It Take to Replace Hydraulic Cylinder Seals?
Repair time depends on cylinder size, seal configuration, mounting arrangement, corrosion, component condition, and access to suitable tools and replacement parts.
A straightforward repair may take substantially less time than a large cylinder overhaul. Additional machining, damaged components, difficult disassembly, or diagnostic testing can extend the process. Obtain an estimate after the cylinder and repair requirements have been assessed.
Can I Reuse an Old Hydraulic Cylinder Seal?
A removed seal should generally be replaced when the repair procedure calls for seal replacement, particularly if it shows wear, deformation, cuts, hardening, or other damage.
Even when a removed seal looks acceptable, reuse may be inappropriate because of the disassembly process or manufacturer requirements. Follow the applicable service instructions and use a verified replacement kit where specified.
Why Is My Hydraulic Cylinder Still Leaking After Seal Replacement?
Possible causes include an incorrect seal kit, installation damage, scratched sealing surfaces, contamination, excessive pressure, side loading, or a leak originating elsewhere in the hydraulic system.
Internal bypass, external leakage, and cylinder drift can have different causes. Reinspect the assembly and diagnose the complete system before replacing more components.
Do I Need to Replace All Hydraulic Cylinder Seals at Once?
This depends on the cylinder design, repair scope, seal condition, and manufacturer’s recommendations.
A complete seal kit is often appropriate when the cylinder has been fully disassembled, because other seals may have experienced similar service conditions and additional disassembly may be costly. However, the required replacement scope should follow the applicable repair procedure rather than an assumed universal rule.
Need Help Identifying the Right Hydraulic Cylinder Seal Kit?
Choosing the correct hydraulic cylinder seal kit requires more than matching the cylinder bore diameter. Seal profile, groove dimensions, piston rod condition, operating pressure, temperature, and hydraulic fluid compatibility all affect sealing performance.
If you cannot identify the original seal kit, contact Toleng Hydraulics with your cylinder model, available dimensions, part number, and photos. The engineering team can review the information and discuss suitable replacement or custom hydraulic cylinder options, subject to the available specifications and service requirements.
Can’t Identify Your Seal Kit? Send Toleng Your Cylinder Dimensions.

